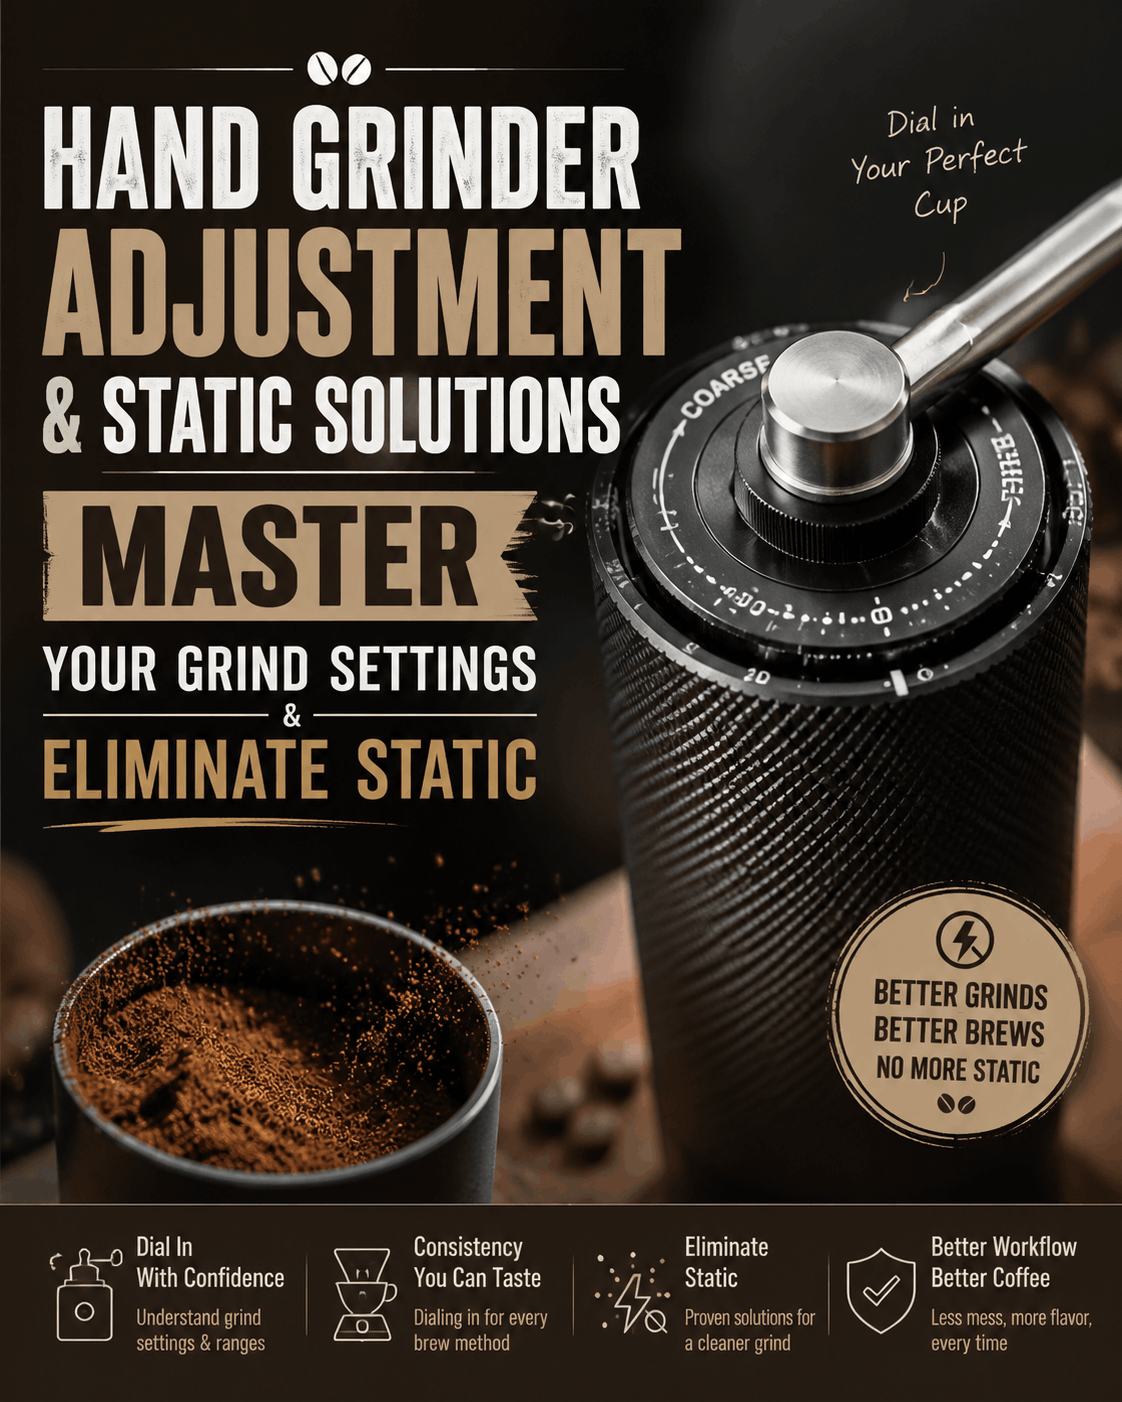
Hand Grinder Adjustment & Static Solutions Master Your Grind Settings & Eliminate Static
Daniel
Author
Published
5 min read
Read Time
Part 1: Building Your Personal Reference System
Finding the perfect grind setting shouldn't be a guessing game. Most grinders come with generic numbers or marks that mean nothing across different beans, roast levels, or brew methods. The solution? Create your own personal reference system.
"I used to randomly turn my grinder dial and hope for the best. Now I have a notebook with exact settings for every bean I buy. It's like having a cheat code." — Reddit user u/systematicbarista
5 Steps to Build Your Reference System
1Choose a Reference Brew Method
Start with your most common brew method—pour-over, espresso, or French press. This becomes your baseline for comparison. Let's say you mainly brew pour-over.
2Pick a Reference Bean
Use the same bean for your initial testing. A medium-light roast from a local roaster works well. Once your system is established, you can adjust for different beans.
3Document Starting Point
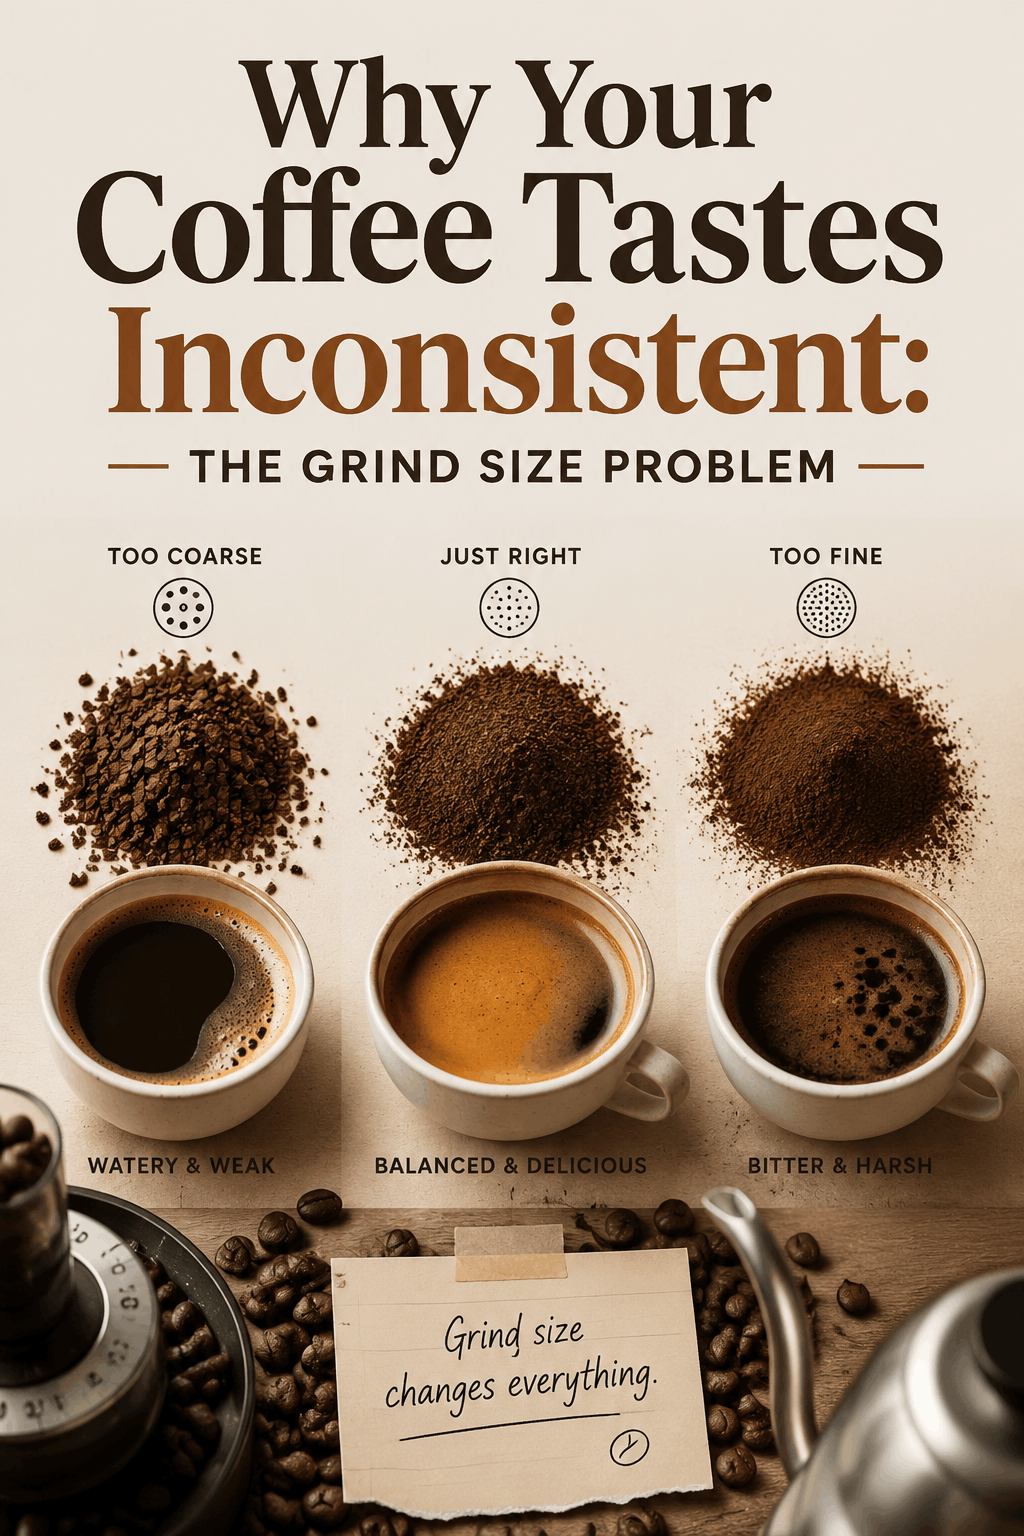
Set your grinder to the middle of its range (e.g., 15 clicks on a 1Zpresso). Grind a small amount and taste it. Note: Is it too fine (strong, bitter) or too coarse (weak, sour)?
4Create a Taste Ladder
Adjust your grinder 2-3 clicks at a time, brewing and tasting at each setting. Create a simple scale:
4-6: Slightly fine (good for espresso)
7-10: Perfect for pour-over
11-14: Slightly coarse (good for Chemex)
15+: Way too coarse (watery, under-extracted)
5Build Your Cheat Sheet
Create a simple reference card (paper or phone notes) with: Bean name & roast date, Optimal grind setting, Brew ratio, Brew time, Tasting notes.
Take photos of your dial position at different settings. Visual references are faster than counting clicks when you're half-asleep in the morning.
Part 2: The RDT Solution for Ultra-Fine Grinds
Grinding to espresso-fine settings often produces something called "rocket fuel"—a dry, powdery mess that flies everywhere except your portafilter. The solution? RDT (Ross Droplet Technique).
"RDT changed my espresso game completely. No more channeling, no more mess, no more frustration. It's literally three extra seconds." — Reddit user u/espressoveteran
🔬 What is RDT?
Named after coffee enthusiast Ross, RDT involves adding a tiny amount of water to your beans before grinding. This moisture eliminates static electricity and clumping, resulting in fluffy, consistent grounds perfect for espresso.
RDT Step-by-Step
- Weigh your beans — Typical dose is 15-20g for a double espresso. Use an accurate scale.
- Add water — Use a ratio of approximately 1:100 (1ml water per 100g beans). For 18g of beans, that's about 0.18ml—just 3-4 drops.
- Mix thoroughly — Stir or shake the beans in your dosing cup or container until they're evenly coated. You should see no visible water droplets.
- Wait 30 seconds — Let the water absorb into the beans' outer layer. This is crucial—skip this step and you'll get soggy grounds.
- Grind normally — Now grind at your espresso setting. The grounds will be fluffy, uniform, and static-free.
- Too much water: Your grounds will become gummy and clog your grinder. Start with fewer drops than you think you need.
- Skipping the wait: Water needs time to penetrate the bean surface. Without the 30-second wait, you'll get uneven results.
No! The amount of water used in RDT is so minimal (less than 0.2ml) that it evaporates during the grinding process or is absorbed by the coffee grounds. Your burrs and internal components are completely safe. What does damage grinders is leaving moisture in the hopper long-term—not the quick RDT process.
Part 3: Static Electricity Solutions
Static cling in hand grinders is caused by friction between beans and burrs, particularly with very dry beans or winter air. Here are proven solutions:
"I'd grind my coffee and it'd literally explode out of the catcher. My counter, my clothes, my floor—everywhere but the portafilter." — Reddit user u/staticcoffee
If you must use a plastic container, try a "knockout" technique: grind into a larger container, then quickly tap it against your counter while rotating. The grounds will form a cake at the bottom and release from the sides more easily.
🎯 Conclusion
Mastering your hand grinder takes practice, but these three techniques—personal reference systems, RDT, and static elimination—will dramatically improve your coffee quality and reduce frustration. Remember: the best baristas aren't born; they build systems.
Written By
Daniel
Obsessed with the perfect grind size and water temperature. Sharing the journey of artisan coffee brewing.
More to Explore
Continue your journey into the world of coffee.
Outdoor Coffee is the Best Coffee – Who Else Agrees?
## What Makes Outdoor Coffee Different? Real talk – I've had countless cups of specialty coffee in...
Why Your Coffee Tastes Inconsistent: The Grind Size Problem
The Mystery of Inconsistent Coffee You used the same beans, same recipe, same process —...
Finding the Perfect Pour-Over Grinder: $800 Budget Upgrade Guide
## The Situation Budget: ~$800 (selling NZ for $500-600 + adding $200) Goal: Noticeable upgrade for...